Discover the potential to enhance your course sites by accessing the One Button Studios that are seamlessly integrated into Vula and Amathuba.

DO's
- Wear colours that are in contrast with the background, this is to avoid colours blending in with the background in post-production editing.
- Lighter shades of red are preferred.
- Wear pants with pockets or a belt, so it’s easier to attach the microphone transmitter.
- Wear Solid colours, like shades of blue, orange, purple, yellow and light red.
DONT’s
- Avoid wearing colours like teal, turquoise, shades of green (especially if you’ll be using the green-screen), reflective clothing, patterns (like stripes or other fine patterns), strong bright reds (it will make your complexion look very red), black, grey and white.
- Avoid wearing any colour that too closely matches your skin tone, because it makes your characteristics, especially your face and body features disappear, making viewers think you’re nude
- Avoid wearing clothes with logos or recognisable brands.
Especially if you use the lightboard the video producers need to flip your image. - Avoid wearing clothing with flimsy or soft material, because the weight of the microphone can pull the light material down.
- No caps/hats as they will cast shadows on your face.

Prepare for Your One Button Studio Recording Session
Congratulations on booking your recording session at our One Button Studio! To help you make the most of your recording experience, we’ve put together a handy guide to prepare you for a seamless and successful session.
To ensure a successful experience, follow these tips:
1. Plan your content and create an outline or script.
2. Practise and rehearse your delivery.
3. Gather all necessary materials and props.
4. Dress appropriately for the video’s purpose.
5. Arrive early to set up and get familiar with the equipment.
6. Bring a compatible storage device for saving your recording.
7. If you’re a first-time user, attend the studio orientation.
8. Relax, enjoy, and take breaks if needed.
Make the most of your recording session and create professional-quality videos effortlessly!
We are delighted to offer you a seamless recording experience at our One Button Studio, now integrated with Amathuba, our trusted digital learning platforms. Capture your videos effortlessly and conveniently, while directly saving your content to these platforms for easy access and sharing with your educational community.
Recording and Saving Process:
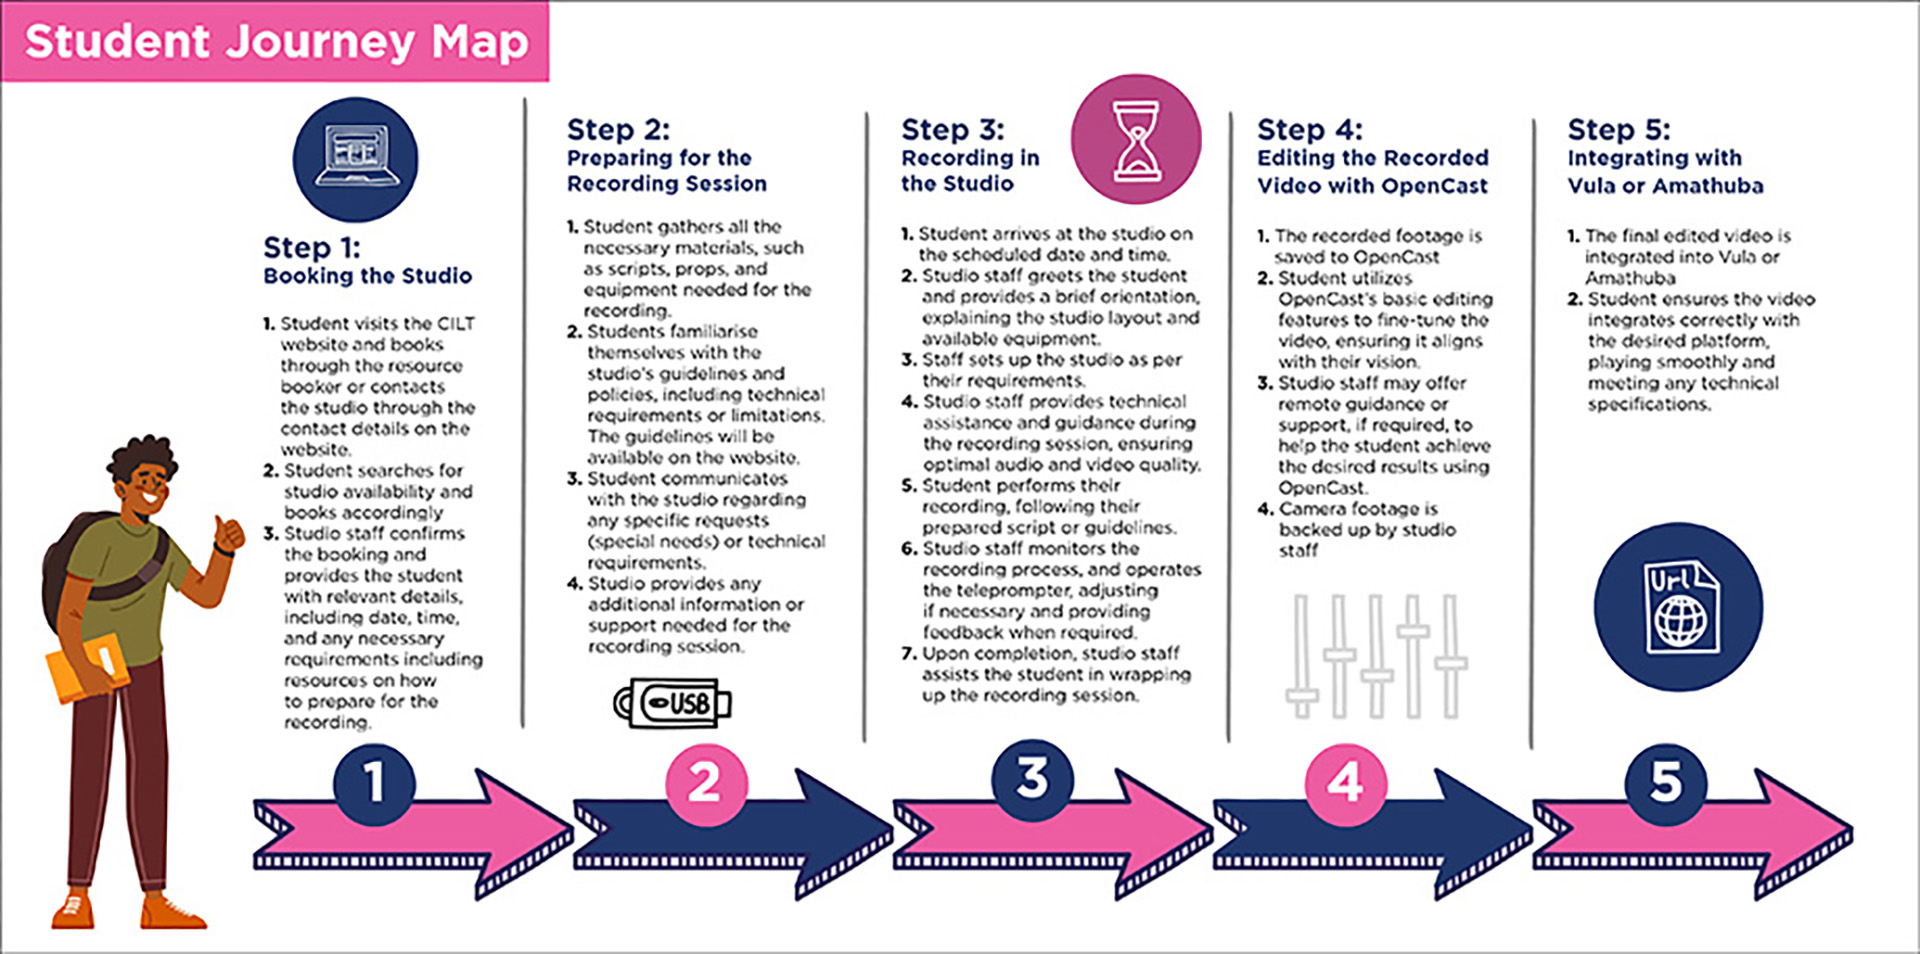
1. Reserve Your Studio Time: Utilise our user-friendly booking system to select your preferred date and time slot for the One Button Studio.
2. Prepare for Your Session: Bring your content and any necessary materials to the studio on your scheduled date.
3. Start Recording with Ease: Upon arrival, our One Button Studio’s intuitive interface allows you to begin recording with a single push of a button.
4. Seamless Content Transfer: At the end of your session, your recorded video will automatically save to Amathuba, ensuring a smooth and efficient workflow.
We understand the importance of refining your video recordings to make them truly shine. That’s why we offer two exceptional editing options: OpenCast and Clipchamp. Whether you prefer a quick and simple edit or more in-depth fine-tuning, we have the tools to bring your videos to the next level.
OpenCast Tutorial
Climpchamp Tutorial
We are thrilled to share that our One Button Studio now seamlessly integrates with Amathuba. This integration enables you to effortlessly incorporate your recorded videos into your educational journey, enhancing collaboration and accessibility for a truly immersive learning experience.
Integration Process:
1. Record in the One Button Studio: Utilise our user-friendly One Button Studio to effortlessly capture high-quality videos for your educational content.
2. Automatic Transfer: Once your recording is complete, our seamless integration will automatically transfer the video to Amathuba. This eliminates the need for manual intervention, saving you valuable time and effort.
3. Organise and Share: Within Amathuba, conveniently organise your videos into the relevant courses, modules, or topics. This streamlined approach ensures easy navigation and access to your content.
4. Engage and Learn: Students and instructors can directly access the recorded videos through Amathuba, fostering interactive learning experiences and facilitating knowledge exchange.
Immerse yourself in the power of seamless integration between One Button Studio and Amathuba. Elevate your educational content, enhance collaboration, and embrace the benefits of accessible learning. Book your recording session at our One Button Studio today and embark on an exciting educational journey!
OB1
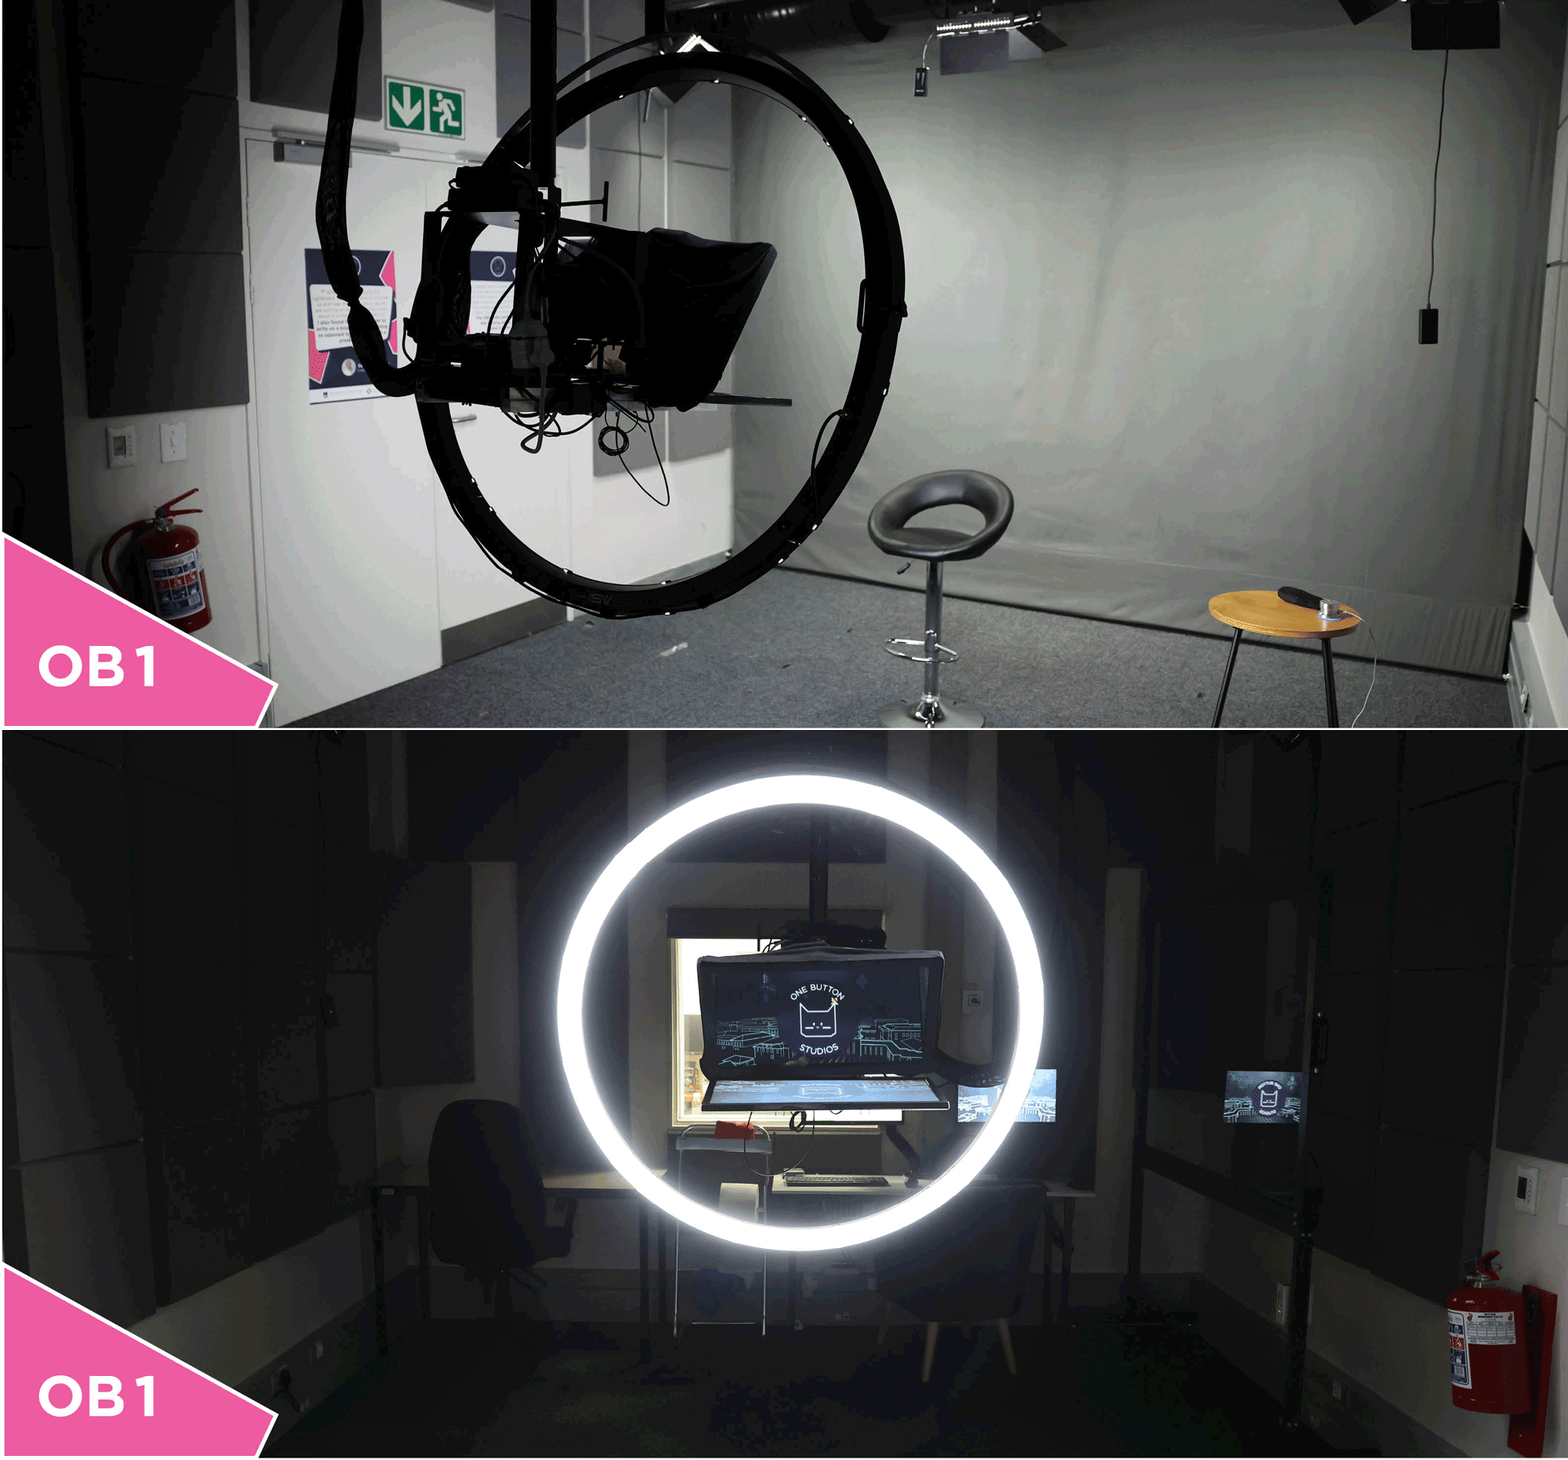
The OB1 studio simplifies the video recording process. Designed with user-friendliness in mind, our studio features a fixed camera equipped with a microphone and a convenient autocue for scripts and PowerPoint presentations. By seamlessly integrating with Vula and Amathuba, the OB1 studio unlocks a wide range of exciting applications. Whether it’s making announcements, recording lectures, conducting two-presenter interviews, or creating translation or sign-language videos, the One Button Studio has got you covered.
With the OB1 studio you can achieve a polished and professional look for your recordings. Its sleek neutral grey background sets the stage for a captivating video presentation. While it may not support green screen functionality, the OB1’s intuitive interface ensures effortless video creation without the need for complex editing techniques.
Unleash the full potential of the OB1. Take your teaching and learning experience to new heights with its seamless integration, automated features, and user-friendly design. Upgrade your video creation process and unlock a world of possibilities in the OB1.

How to book OB 1
Resource Booker Process:
1. Select Your Preferred Date and Time: Use our booking sytem to choose a date and time slot that suits your schedule
2. Provide Details: Let us know the purpose of your recording, the estimated duration, and any specific requirements you may have
3. Confirmation: Once we receive your booking request, we will review it and send you a confirmation email with all the necessary details
4. Studio Orientation (For First-time Users): If you’re new to our OB1, we offer a brief orientation to familiarise you with the equipment and ensure a smooth recording experience
5. Get Creative and Record: Arrive at our studio at your scheduled time, bring your content, and start recording at the hit of just one button
Don’t miss out on the opportunity to create professional-quality videos with ease. Book our OB1 today and unleash your creativity!

Our studios are located in Steve Biko Building, Upper Campus on Level 5.


